Unplugged coding – 12 offline coding activities for kindergarten and beginners


Teaching coding to preschool and early school kids is a challenge but there are several unplugged coding activities through which children can learn coding & have fun at the same time.
What’s an unplugged coding activity?
The activity using which we can engage and teach coding without computers or screen is known as unplugged coding activity.
Unplugged, offline coding or screen-less coding is particularly beneficial for kids. They can build their logical, analytical and critical thinking skills and gain the advantages of learning computer programming but still staying away from screens.
Start teaching coding to kids with unplugged coding also strengthens their abilities to program computers in future as their foundation is built correct.
Here we present a few screenless, offline coding activities along with suitable worksheets. Educators can perform these activities within their groups of learners without any requirement of an electronic device, internet connectivity or prior knowledge of programming and coding. Read the teacher’s guide on how to conduct an offline coding camp.
There is a well-crafted offline coding activities book available for teachers and parents who would like to teach concepts of coding to kids of age 5, 6, and 7. The book covers 100+ fun activities to teach programming concepts without a screen. The book is being delivered across the world, and you can buy the book in bulk too.
1. Roleplay

“Give me a glass of water, please”. Kids can understand and follow these instructions & can also instruct others. How about assigning such tasks to robots?
The way of communication changes. Just how two humans talk to each other through a language, an interaction between a human & a robot can be done through programming.
When a person is instructed to get a glass of water, they are aware of where the glass & water is. They will complete the task with ease. But a child does not inherit that knowledge from within & thus he requires practice & step by step instructions.
Similarly, when you expect a robot to follow such tasks, step by step instructions in the form of coding or programming are to be provided before the initiation of the task.
This roleplay activity intends to help your child or student understand the working & decision-making principles of a robot.
How to perform
It is divided into two different characters; the Programmer & the Robot. The task would be given by a “Programmer” kid to a “Robot” kid. The activity aims to teach basic algorithms to the children or in layman’s terms; thinking from the perspective of a robot (which is software with a physical body).
Things you will need – Almost nothing.
New skills learnt – Algorithmic thinking, Sequencing, Debugging, Paths and directions.
Ages – 6+.
Step 1 – Choose your task & its difficulty
- Think of any task which you can assign to children of age 6 and above. For example, “bring me a glass of water” or “close the window”. These are such activities that kids can follow after clear instructions are provided.
- Be creative with your task selection as it is extremely important. Feel free to go for a chocolate pudding or something that your child or student likes.
Step 2 – Assign the role of Robot & Programmer
- Assign the role of the programmer & robot between the children.
- The “Programmer Kid” is to instruct the “Robot Kid” & make sure that the activity is completed without any errors.
- You can become the robot or programmer if there is only one child.
Step 3 – Provide key details of the task
- Since there is a programmer & robot involved, step by step instructions are to be provided to the robot by the programmer.
- A concise program of the task with instructions is provided below. Two children are participating in it.

- The task will be completed only when the robot is back in its idle state.
Step 4 – Providing incentives & checkpoints
- To keep the role play interesting & engaging, make checkpoints.
- Attach some rewards at the checkpoints made.
Following are some of the fun roleplay activities that you can participate in right now with children.
- Keeping books inside a bag
- Writing something on the blackboard/whiteboard
- Sitting on a chair
- Switching on/off the light
- Closing/opening the door
- Getting an object from another room
2. Arrow Programming
Arrow Programming in simple terms is writing a program or set of instructions through arrows. Two activities are given below.
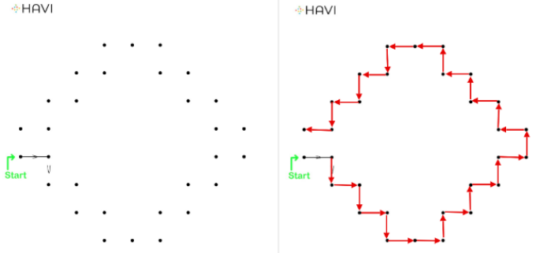
Connecting Dots
The aim of this activity is to join all the dots through 4 arrows; “→”, “↓”, “↑”, “←”.
Maze Activity 1
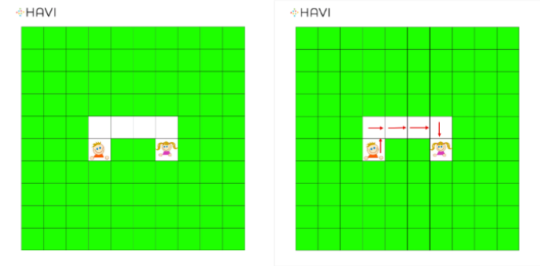
As the name suggests, this activity contains a maze. Use Up ↑ Arrow, Down ↓ Arrow, Left ← Arrow & Right → Arrow to move the boy to the girl.
Maze Activity 2
Move the boy towards the girl using the following arrows – “→”, “↓”, “↑”, “←”.

Maze Activity 3
Move the boy towards the girl. Use these following arrows: “→”, “↓”, “↑”, “←”.

3. Debugging
Debugging means finding an error or bug and fixing it. Some debugging activities are given below.
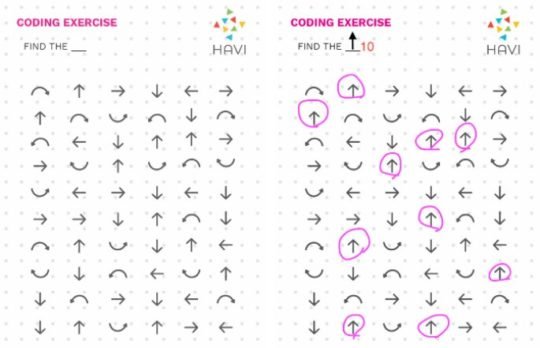
Pattern Matching Activity 1
Find the specified arrow in the blank space & circle it below.
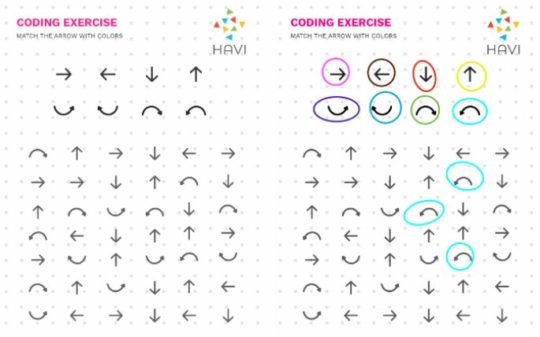
Pattern Matching Activity 2
Match the given arrows which are similar with the same colors.
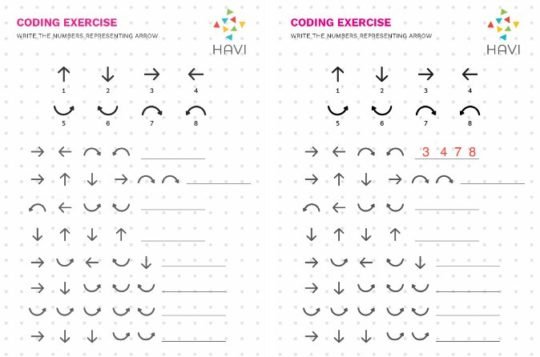
Pattern Matching Activity 3
Write the numbers associated with the given arrows.
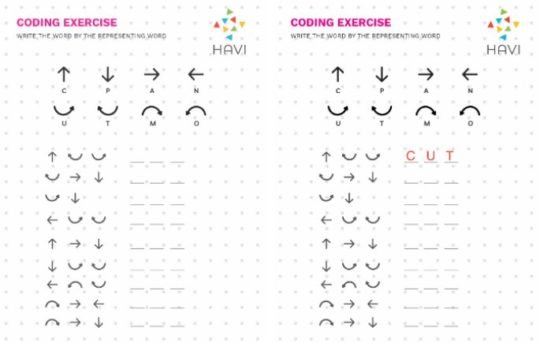
Pattern Matching Activity 4
Fill in the blanks with alphabets & form words.
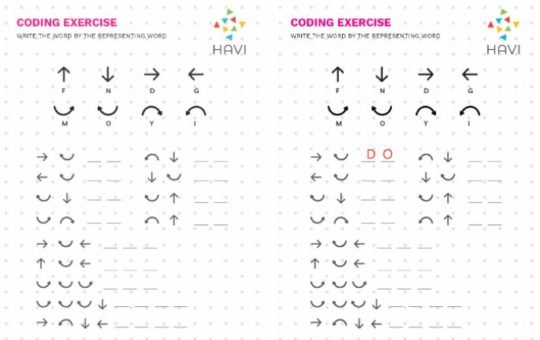
Pattern Matching Activity 5
Use the alphabets to form words in the empty spaces.
Pattern Matching Activity 6
Identify the numbers associated with the arrows & solve the given problems.
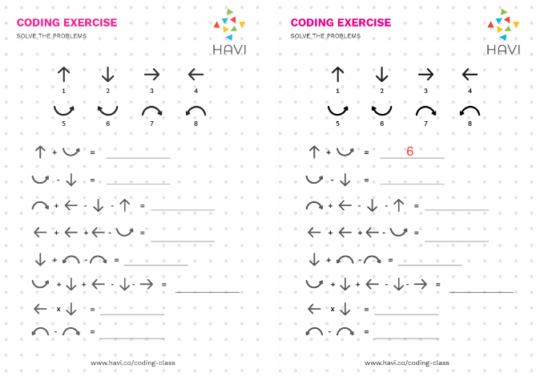
4. Coding with cups
Coding with cups is the most fun and effective unplugged coding activity specially for kindergarten kids.
It’s about stacking the paper cups in a specific design. This will help develop coding and code testing skills together.
Let’s understand how to teach coding with cups.
What you need?
10 to 20 paper cups per child.
Papers
Flash cards
Marker pen or sketch pen
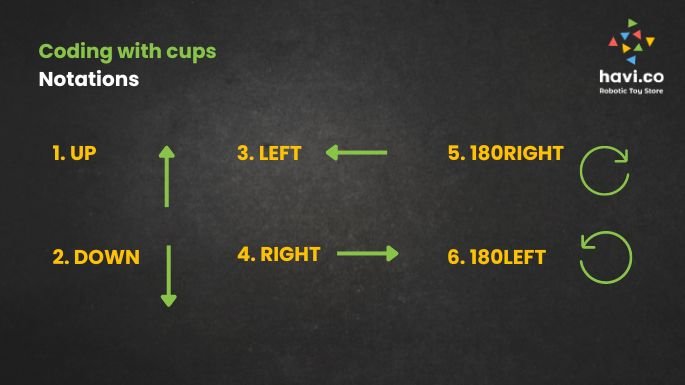
Notations
The cup coding activity is done through a set of arrows. Each of the arrows has a specific instruction attached. The instruction is to be followed by the hand.
UP: pull the paper cup from the stack
DOWN: put the cup down
LEFT: Move left side by radius of the cup
RIGHT: Move right side by radius of the cup
180LEFT: Turn the hand 180 degree left
180RIGHT: Turn the hand 180 degree right
Let’s consider following example
You want to move one cup as shown in the picture.
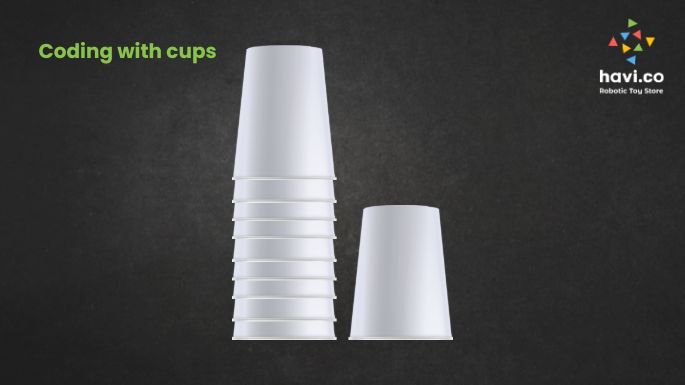
So the instruction to the hand for that cup would be
UP RIGHT RIGHT DOWN

That’s it. You have moved the cup to the right position.
What code will you write to move another cup as shown here?

UP RIGHT RIGHT RIGHT RIGHT DOWN
Correct? Umm yes and no.
This code is correct to bring the second cup to the right position but remember that we write the code to instruct the “robotic hand”. And before we start giving instructions for the second cup, have we asked the hand to come back to the stack? 🙂
So code for first cup should be like this
UP RIGHT RIGHT DOWN LEFT LEFT

So the hand comes back to the position to pick another cup. Then comes the code for cup 2.
UP RIGHT RIGHT RIGHT RIGHT DOWN LEFT LEFT LEFT LEFT


Understood?
And now we are stacking the third cup.

UP RIGHT RIGHT RIGHT DOWN LEFT LEFT LEFT


Remember that we move our hand by the radius of the cup. Hence we have moved the hand 3 times left. Try it yourself.
So finally the following is the pattern and associated code.
UP RIGHT RIGHT DOWN LEFT LEFT
UP RIGHT RIGHT RIGHT RIGHT DOWN LEFT LEFT LEFT LEFT
UP RIGHT RIGHT RIGHT DOWN LEFT LEFT LEFT
We have two other arrow instructions too.
Turn left and tern right
Take the example of following stack design. We want to put the fourth cup over the third cup, but not upside down this time. We will have to rotate our hand by 180 degree to do so. Following is the code for cup 4.
UP RIGHT RIGHT RIGHT 180RIGHT DOWN 180LEFT LEFT LEFT LEFT
Can you now write a code to prepare the following stack design?


And can you ask someone to test your program by making a stack following your code. You are not required to show them the design, just the code. If they can make the stack design exactly, your code is correct. Congratulations.
If not, find the bug and correct it. Ask again to test it.
So cup coding activity can be done in multiple ways.
1. Write a program to make a cup stack in a specific design
2. Follow the given code to make a cup stack in a specific design
You can ask a kid to make the stack design using the code prepared by the other kid. That’s how everyone stays engaged and team work improves.
In the worksheet provided here, you will find a few cup stack designs you can share with your children and a few codes you can ask your children to make cup stack with.
Get More Free Downloadable Worksheets

