Make a moving solar system working model using Havi Elements

Do you know Kiyan? Kiyan is a 4th grade student who loves to create things. His parents have bought him a pack of Havi’s DIY robotic starter kit.
One day he nominated himself to the school science projects fair and submitted a proposal to make a moving, rotating solar system working model.
The parents were happy and a few friends were skeptical.
But he did it finally and we at havi.co are proud of him. Hence, we decided to document his work into a blog post and share with everyone.
Here is how Kiyan made his solar system project with photos and videos. Know how he has done and do it your own way.
Solar system project material required
Elements:
Power – 2
Motor – 1
LED – 2
Accessories:
Power bank with usb cable – 2
Red LED cables – 6
Yellow LED cables – 2
Wheel – 1
Geared motor – 1
Double sided tape
Craft material:
Thermocol sheets
Thermocol Balls
Large Box/ cardboard
Tripod
Small box
Bulb head
Colors
Black sheets
Glitter and stars
Thin coil wire
Skewers
Important Notes
The elements and accessories required for these projects can be managed in following ways.
1. With Havi – DIY Robotics Starter Kit and DIY Robotic Car Kit. But you will need an extra power element, power bank, usb cable, LED element and LED cables. You can buy them separate OR you can use something else, like a regular torch to make the sun.
2. If your school/institute has Havi’s kits in the robotics lab, you would have multiple elements there. Just use and enjoy. Take necessary permissions though.
3. The Geared motors in the kits as designed to power the cars, hence are faster for solar system. You may need a very slow motor. Please contact us for same.
4. You can contact us to get the customized pack of making moving solar system project model.
The making
Step 1
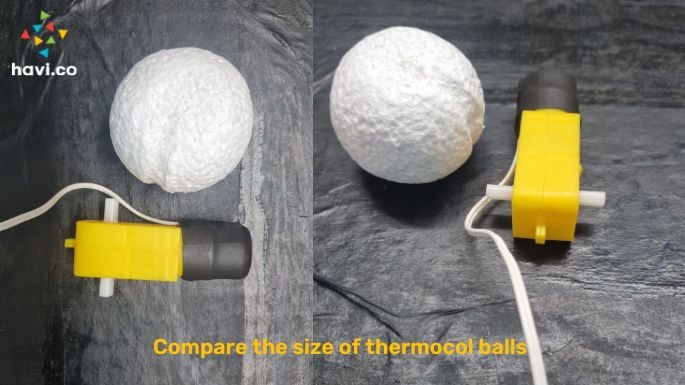
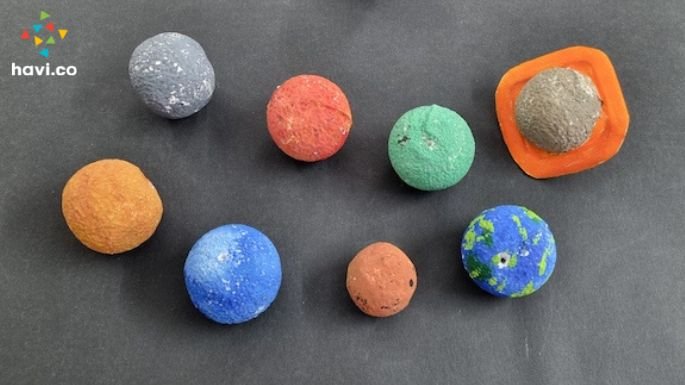
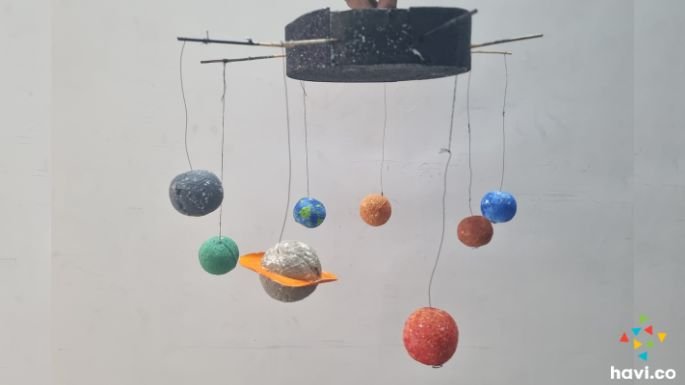
Use 8 different thermocol balls to make planets. Color them well and make the rings of Saturn
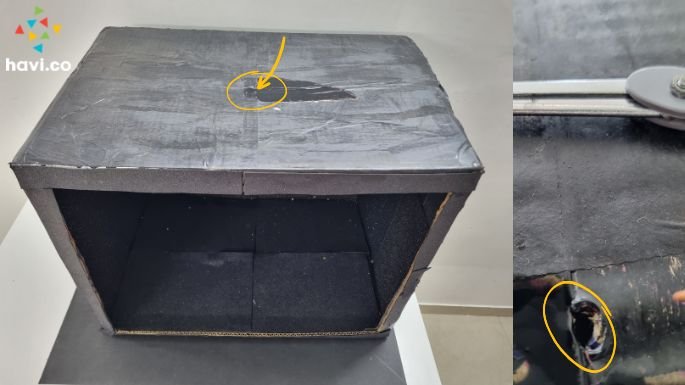
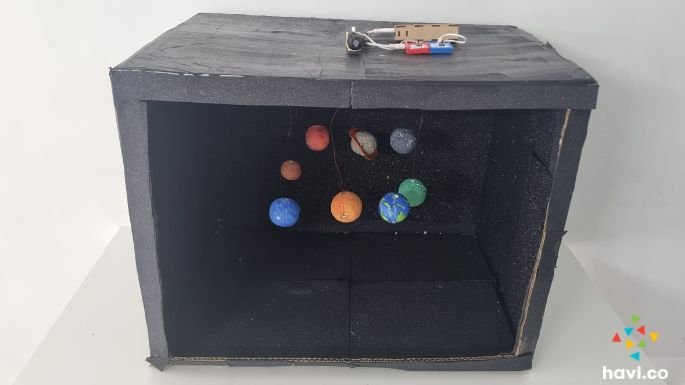
Get or make a box and paint it black. Can use black sheets too, instead of color. The size of box Kiyan has used is provided here for reference.

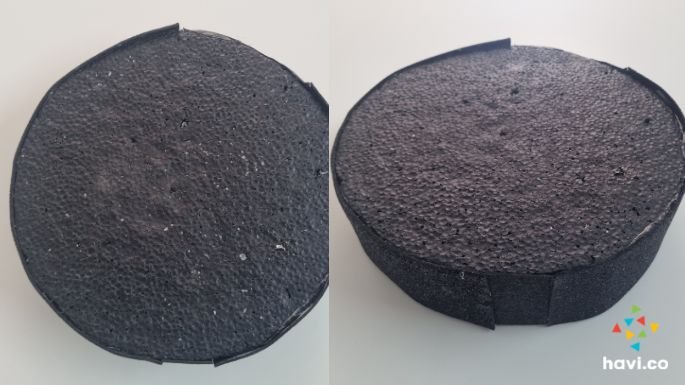
Cut a disc with 20 cm diameter out of a thick (at least 5 cm) thermocol sheet. Color it black.
Remove the wheel grip. We need only the yellow ring for the project but keep the grip safe. Need to cover the wheel back with grip after the project.

Make a round cavity into the middle of the thermocol disc, so that the wheel fits inside the cavity till half way. You can wrap the wheel ring with DST before inserting to make the bond tighter.

Pierce through the thermocol balls using a skewer and pass a piece (around 20 cm long) of coil wire through it. Make a knot so the wire does not come out. Tie the other end of the wire with the skewer’s non-pointing side.

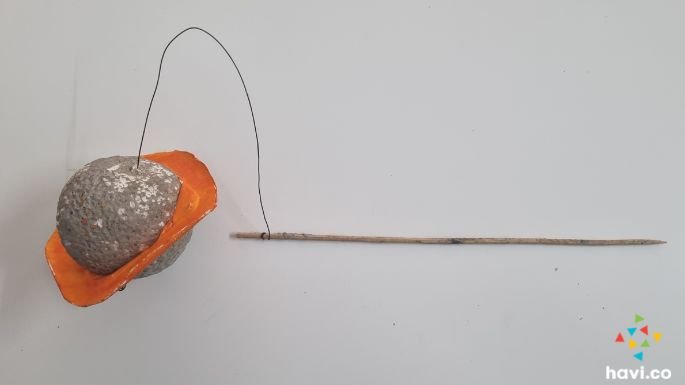
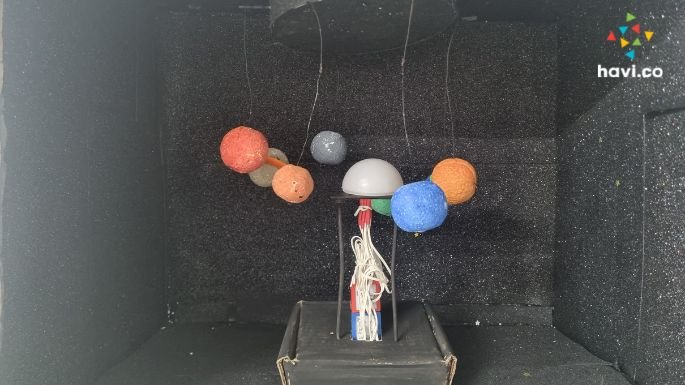
Insert the skewers one by one into the thermocol disc. Keep the balls at different height and also insert the skewers up to different depths to make the orbits realistic.
Color the skewers and wires to black.
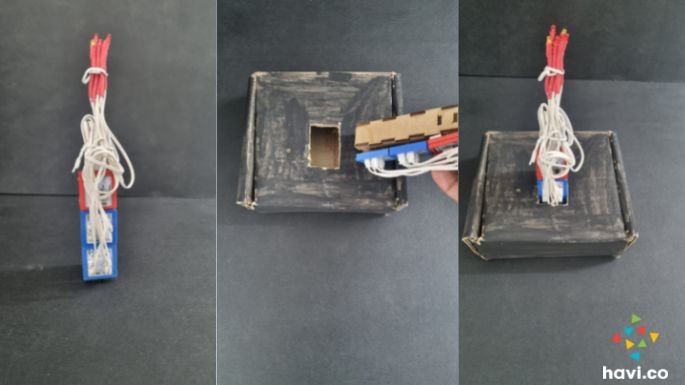
Pierce a hole into the box top at middle-center. Place the geared motor and stick with DST so that one shaft passes through the hole and would be visible from inside of the box.

Make the Power-Motor circuit and connect the geared motor with the motor element. Turn on the power element just to check if the shaft is smoothly rotating within the hole. Hole should be big enough for the shaft to move smoothly.
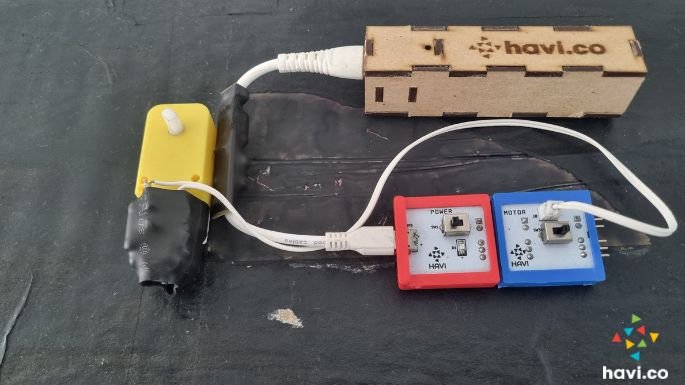
As you insert the motor shaft into the wheel’s shaft slot while making a car, same way insert the shaft into the slot, through the box. With this, your planet disc setup will be hanging inside the box.
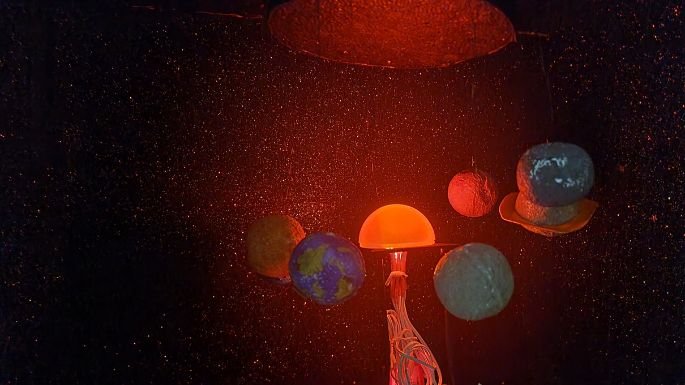
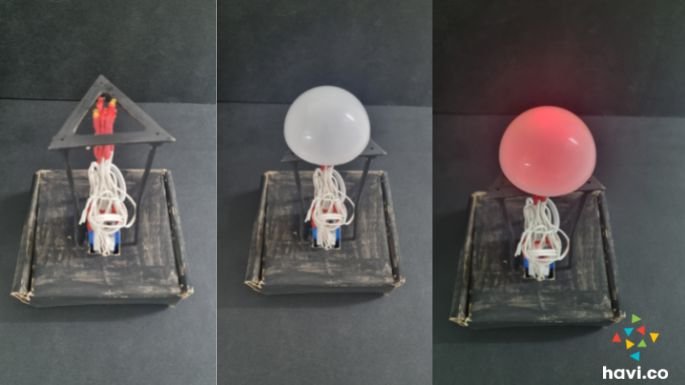
Now, let’s make the sun.
You can use one or two LED elements to power up 4 or 8 LEDs respectively. Make the circuit and tie the LED cables and USB cable tightly to keep the LEDs pointing upward.
We are going to cover the LEDs with a bulb head. And to support that we can use a box and a tripod. You can arrange the things yourself and the final setup should be as shown in the photo. And the bulb head should reach within the planets. See the photos.
You are done with the setup and it’s time to execute and play.
First turn on your sun (Power element switch) and then turn on the planet disc.
The motor shaft rotates. It pushes the wheel which moves the disc and the disc makes the planets orbit the sun. So much fun!
Now it’s your time to create. Do it yourself or make a team with your friends, siblings or parents to make this project. Divide the work. Make it beautiful and actual. Share the output with us.
If you are publishing on social media, tag us on @MadeByHavi on all the channels.