How to make DIY Torch light
Who is fond of LEDs? Did you know that when starting your journey with electronics/robotics, one of the most basic creations you can make is a DIY torch light or DIY flashlight using Havi Elements?
You can represent this LED lights project model at your school science fairs as well.
Additionally, if you have a toddler at home who loves LED lights, you can provide them with ample playtime using this rechargeable, colorful, safe, and easy DIY torch light.
You can undertake this project using the DIY Robotics Starter Kit, Havi’s DIY Smart Lighting Kit, and Havi Elements – DIY Robotic Toy Car.
Things needed to make DIY Torch light at home
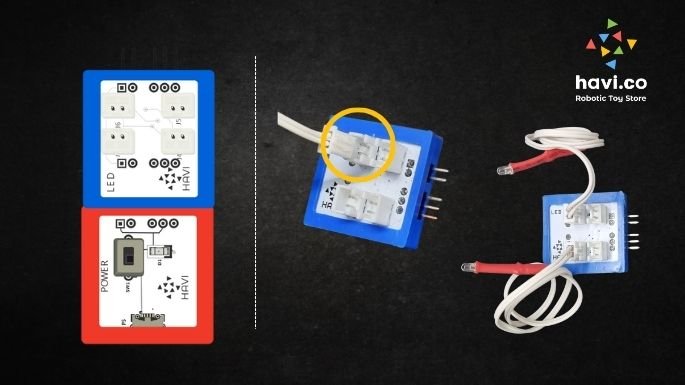
Elements
- Power Element – 1
- LED Element – 1
Accessories
- LED cables/lights: 2/4
- Powerbank with USB cable: 1
Contact us to get these elements & accessories.
Craft material
- Double sided tape
- Wire ties
- Rubber bands
- Cutter/Scissor
- Card paper
How to make DIY Torch light at home?
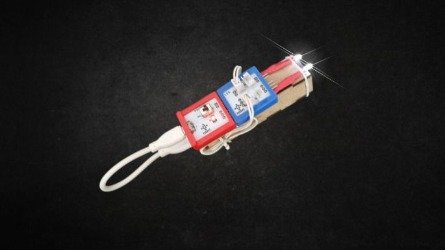
Step 1
Make the circuit: Power + LED
Step 2
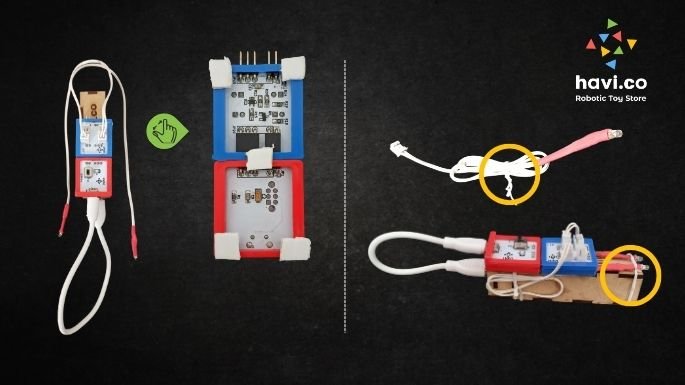
Connect the LED cables with the LED Element. You can use 2 or 4 LED cables. Here, we are using 2 LED cables.
Stick the circuit over the powerbank using DST(Double-sided tape) pieces.
Step 4
Fold each LED cable and tie the cable using wire tie or rubber band.
Step 5
Arrange the LED cables in the sides of powerbank. Use wire tie or rubber band to tie the cables with the powerbank. Tie in such a way that the cables should be steady.
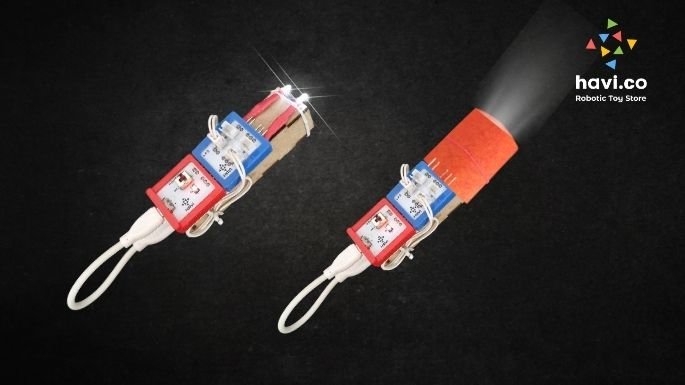
Turn the Power ON. The DIY torch light is ready. Now, to concentrate the emitted light from LED cables, we can cover them with a piece of paper as defined. That helps emitted lights to be more focused towards the objects in front.
Try different combinations of LED lights and check what works best.
How does DIY Torch-light work?
What happens when you turn on the lights, fan, etc.? Yes, they function as per the requirement.
Similarly, when you switch on the power bank, it passes the stored current to the Power Element. The Power Element then transfers the current to the connected LED Element. The LED Element receives the required current to illuminate all the connected LEDs at the same intensity. You can observe that even if you connect 1, 2, 3, or 4 LED cables, all will glow with a similar intensity.
Advantages when implemented in real world
You can use the DIY torch light as it is with the replacement of the torch. Additionally, you can utilize the same circuit to create multiple LED craft projects. Some of them are as below:
LED lights mini projects
Bicycle lights
DIY Cupboard lights
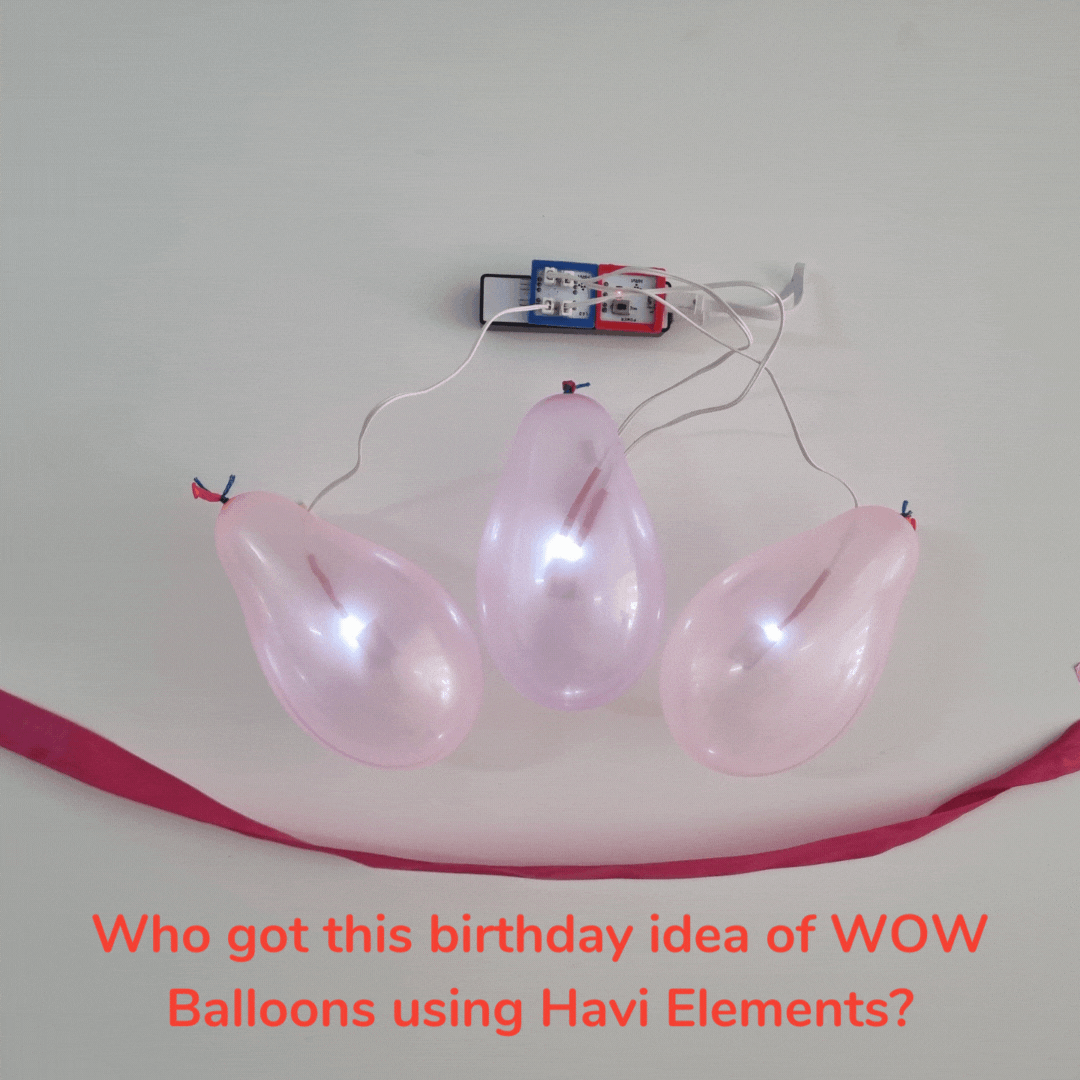
WOW balloons with small LEDs