How to make a robot car at home – with 19 robotic functions
Who would like to make a robot car with a sporty smart look? And that too, with 19 smart car functions?? In this blog post, we are going to make a robot car using Havi’s DIY robotic car kit and then will build and understand the 19 different functions of the robot car.
The user manual that comes with the kit has an even more elaborate explanation of the making process.
Let’s begin…
What is a robot car?
A robot car is a car with some autonomous features in it. Basically, you see there are two words. Robot and Car. A car means a vehicle and a robot means a machine that has some sort of autonomous working ability. Hence, a robot car would have a certain level of autonomous or self-decision-making abilities.
It can be a self-driving car, a car that stops at an obstacle to prevent an accident, or a car that follows a specific path. All of these are functions that need less or no human intervention while driving. And these functions make a car – the Robot Car!
You would have heard the alarm that rings when a car approaches a wall while reversing. But what if the car stops by itself when it’s “too dangerous” to go further? Now we can call this a robotic car.
We are going to build an easy robot toy car for kids with not just 2, 5, but 19 robotic functions in it.
What do you need to make a robot car?
You can build a robot car with Havi Elements. All you need is the Havi Elements DIY robotic car kit. It has everything in the box to build a robot toy car, wooden plates, electronic blocks, motors, wheels and a rechargeable power bank.
Is programming required to make a Robot Car?
We are going to make an easy to build toy robot car, and for that, we don’t need to know programming. We can achieve several smart car and robotic functions using Havi Elements. For example, we are going to make a car that works as a follow-me robot, draws a circle, and avoids the cliff of a table.
Further we can build even more complex and accurate robot car using the Havi Controller and Python programming. Havi controller is a powerful controller like arduino, ESP32 or Raspberry Pi with inbuilt wifi and bluetooth.
For now, let’s build a robot car without programming, which kids and beginners can easily build at home, maybe as a 1 to 3 hours project.
Are Robot Cars and Remote Cars the same?
Not really. A robot car drives with the logic that you have applied through programming or hardware configuration. There is a huge learning opportunity in terms of STEAM education when you build and play with a robot car.
In contrast, a remote controlled car works with the buttons pressed on the remote control. There is little or no learning unless you have built the remote controlled car yourself from scratch!
But yes, you can build a function in a Robot car so the car operates with the button press of our TV or AC remote control!
So buying a DIY Robot car is a better choice compared to a RC car. Know the detailed comparison of a remote car and robot car here.
The making of Toy Robot Car
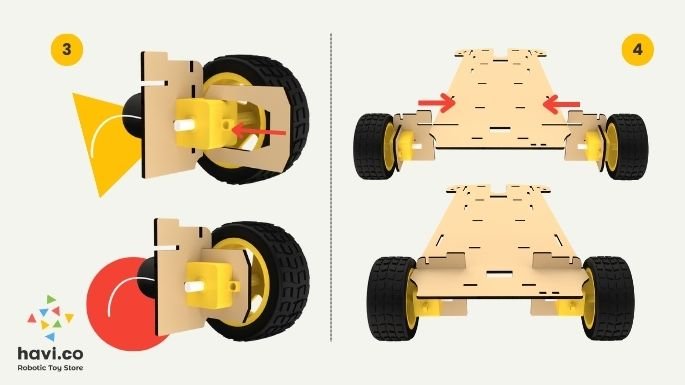
Step: 1
Connect the wheel with the shaft of the geared motor. On the other side, insert the motor into the motor holder.

Step: 2
Lock the motor holder using a motor lock plate. And place the entire setup into the car chassis.
Step: 3
Insert all element locks into the slots of the car chassis. On the other side, tie them with rubber bands.
Step: 4
Now, at the front of the base plate, adjust the roller and lock it with the rollers’ c lock plate. On the other side, tie it with a rubber band.

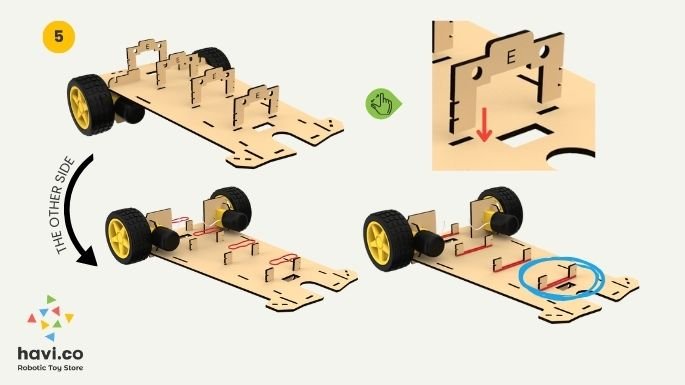
Step: 5
Find the power bank plate from the DIY robotic car kit and insert the power bank into that. Make sure that the USB slot of the power bank should be inserted at the broader side of the plate.

Step: 6
Snap the remaining plates one by one into the car base.


Step: 7
Snap the circuit: Power + Motor + Motor
Step: 8
On the bottom of the car, between the ends of Elements’ lock plates, place the circuit. Fix the circuit with rubber bands(Mark the cut given on elements’ lock plates for rubber bands).

Step: 9
Connect the power bank with Power Element using USB cable. Connect the geared motor with Motor Element.

Turn the Power Element ON. Your robot car is ready to move.
You make seven basic robot car functions using the switch variation.
Basic robot car functions
1. Robot car forward
2. Robot car reverse
3. Circular robot car
4. Circle drawing car
5. Flyover climbing car

6. One motor circling car
7. One motor circle drawing car
So far, we have made 7 creations using Power & Motor Elements. Now, we will add IR sensor to the circuit.
What is an IR sensor & how does it work?
The full form of IR is Infrared. IR is used to detect an object. IR passes YES signal to next Element if any object will be there, else passes NO signal to the next Element. For details, check how IR sensor works?
IR assembly in robot car:
Step: 10
On the side of the base plate, fit the IR assembly plate as defined with the arm pin. On the other side, fix it with the rubber band.

Step: 11
Adjust small IR in the IR extension slot. Adjust in such a way that the wire slot should face downwards. Fix that with the rubber bands.

Now, you can make 12 smart robot car functions using IR sensor extension.
8. Touch me not robot
9. Follow me robot car
10. Remote controlled car
11. Edge avoiding robot
12. Parking sensor
13. Smart reverse car parking sensor
14. Front accident avoiding car
15. Obstacle avoiding car(stops at obstacle)
16. Obstacle avoiding car(turns at obstacle)
17. Brake lights
18. Line follower robot car
19. Spiral car

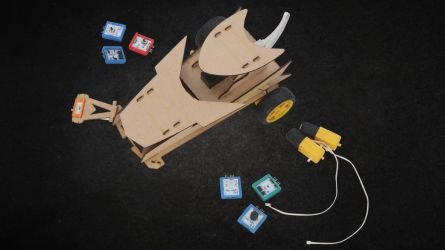
That’s how you can make 19 smart car functions using Havi’s DIY robot car kit. But now let us reveal something important. Many creators have built new functions and new ways to use these functions. Take for example this team Aarav made this robot car carrying Laddu for Ganesha during Ganesh festival.
