How to make a radar system using ultrasonic sensor

Have you ever wondered how submarines, warships, or even self-driving cars know what’s around them without using eyes? A submarine can “see” underwater, an airplane can sense the nearest airport, and an autonomous car can detect obstacles in its path. But here’s the catch — they don’t see the way we do. Instead, they use sound waves to sense their surroundings.
This technology is called SONAR — Sound Navigation and Ranging. SONAR works by sending out ultrasonic sound waves (very high-frequency sounds we can’t hear) and listening for their echoes when they bounce back from objects. By measuring the time taken for the echo to return, the system can figure out how far away an object is, and even map its position.
There are two types of SONAR systems:
1. Passive SONAR — it only listens for sound sources. Because it’s quiet and stealthy, it’s often used in military applications.
2. Active SONAR — it actively sends out sound pulses and measures the returning echoes to calculate distances.
Similar to SONAR, there is another technology which is called RADAR – Radio Detection and Ranging. This technology uses radio waves instead of sound waves to detect the object. The primary medium where RADAR is used is air/space while SONAR is used underwater.
In this blog, we are going to make a radar system, but using the ultrasonic sensor, Havi controller (an esp32 based microcontroller, more powerful than arduino)and the servo motor. Together, it let us scan the environment, just like submarines and smart machines, and build our very own sound-based “eyes.”. You can make this python project to showcase the military applications & safety applications in your science fairs. Get all the components from Havi advanced robotics kit add-on. Or you can contact us to get these project-specific components.
Things you need to make Radar system
Components
- Havi Controller
- Ultrasonic sensor – 2
- Servo motor – 1
Accessories
- Power bank with USB cable
- Data cable
- Servo motor mount
Craft material
- Card board
- Cutter/Scissor
For programming
- Computer or laptop
- Software: Thonny, Python IDE(3.13.7+)
How to make a radar system at home
We are going to make 4 variations of radar system
1. 180 sonar mapped(locally hosted)
2. 360 sonar mapped(locally hosted)
3. 180 sonar mapped(web hosted)
4. 360 sonar mapped(web hosted)
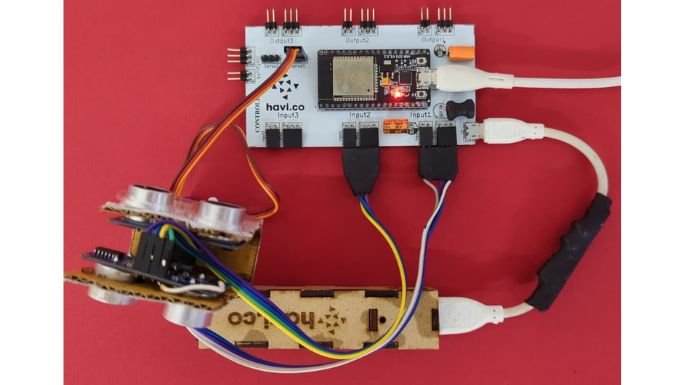
First, let’s make the circuit.
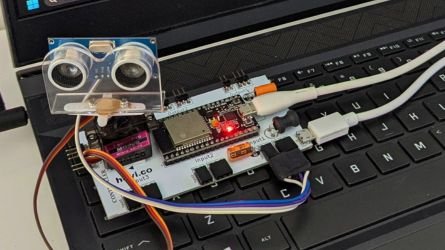
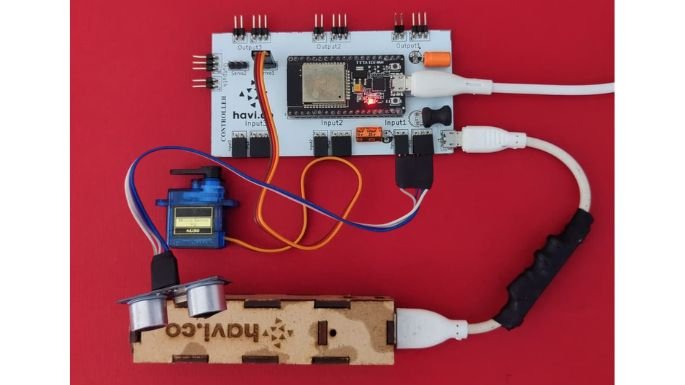
Step 1:
Connect the ultrasonic sensor to input 1 of the Havi controller.

Step 2:
Connect the servo motor to servo 1 port of the Havi controller.
Step 3:
Connect the controller to the laptop/desktop using data cable & connect the power bank with controller using USB cable.
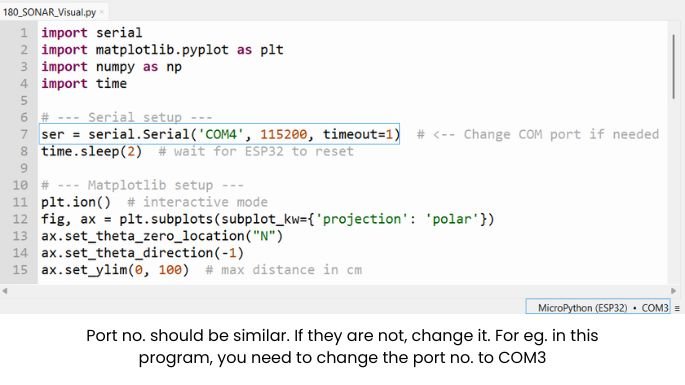
Open the Thonny & check for the correct COM Port on the bottom right, and stop any ongoing execution.
Project variation 1: 180 Degrees mapped radar(Locally hosted)
Step 4
Attach the ultrasonic sensor mount onto the servo and place the sensor in it.


Step 5
Download the python program files by clicking on the following button.
Step 6
Create a folder “Radar” in your laptop/computer & save the file ‘180_SONAR_Local_Visual.py’ in that folder. Note the address of the file.
Check the COM port & change the COM Port to that of the controller if not the same already.
Step 7
Paste the file “RunSONARLocal_180.txt” from downloaded folder to “Radar” folder. Open the file “RunSONARLocal_180.txt”. The code will be as below:
“
@echo off
cd /d “Your file address”
python “180_SONAR_Local_Visual.py”
pause
”
Here, ‘Your file address’ refers to the file location of ‘180_SONAR_Local_Visual.py’ file. So edit it accordingly.
Save the text file as ‘RunSONAR.bat’ and keep ‘All Files’ type while saving in the ‘Radar’ folder.
Step 8
Now, in Thonny open the code named ‘180 SONAR_Loc.py’ and run the code, and close Thonny.
Step 9
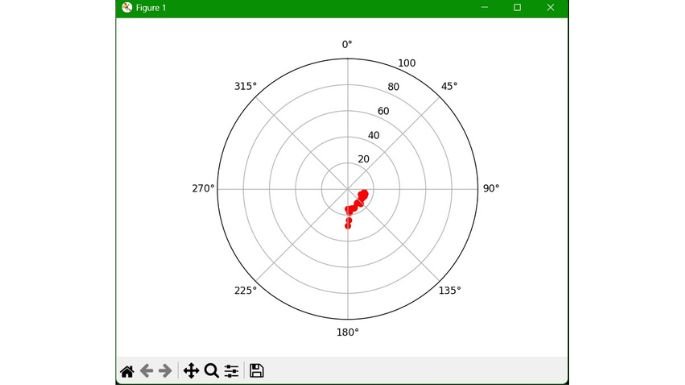
Open the folder and double click the ‘RunSONAR.bat’ file, you will see a new window will open with a 2D SONAR map.
Project variation 2: 360 Degrees mapped radar(Locally hosted)
Follow the first three steps as defined before.
Step 4
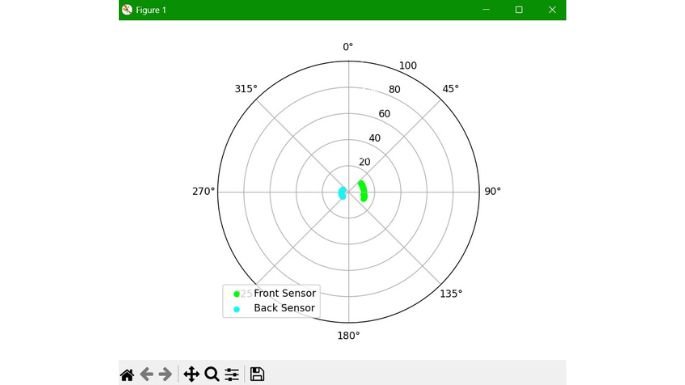
Connect one more ultrasonic sensor to the input 2 of the Havi controller. Use cardboard to fix both ultrasonic sensor & attach servo motor with cardboard.

Now, repeat step 6 to 9 from previous version. Use the code file ‘360_SONAR_Local_Visual.py’ instead of ‘180_SONAR_Local_Visual.py’. Use ‘RunSONARLocal_360.txt’ instead of ‘RunSONARLocal_180’. And use the sonar location map ‘360 SONAR_Loc.py’ file instead of ‘180 SONAR_Loc.py’.
And then when you open the ‘RunSONAR.bat’ file, you will see a new window will open with a 2D SONAR map.
Project variation 3: 180 Degree SONAR map – Web hosted
Follow the first three steps as defined before.
Step 4
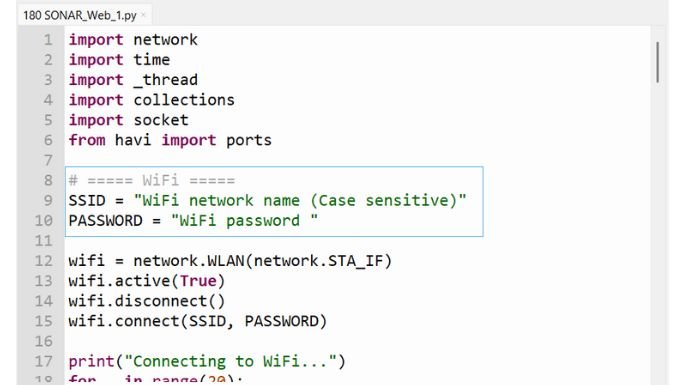
Use the code file ‘180 SONAR_Web.py’ & save it to the ‘Radar’ folder.
Step 5
Enter your wifi name and password in the code (Case Sensitive).
Step 6
Now in Thonny, open the code named ‘180 SONAR_Web.py’ and run the code, and check if the Wifi is connected or not in the shell.
You can verify the wifi connection as below:
Once successfully connected to the wifi, the server address will show up in the shell, copy that server address and paste it in the browser’s address bar (Ensure the device opening the browser is connected to the same wifi as the Havi Controller).
Step 7
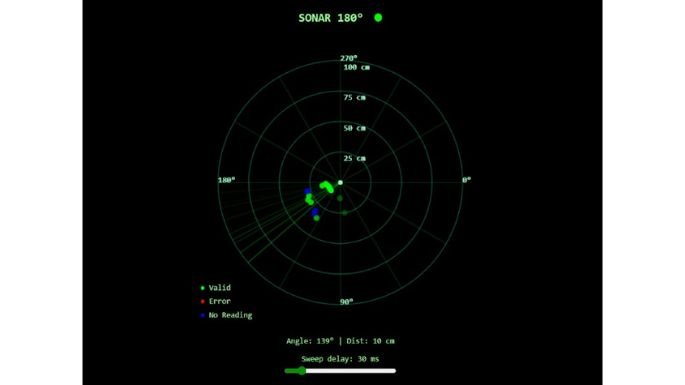
Now an active 2D SONAR Map will be displayed on the browser.
Project variation 4: 360 Degrees SONAR map – Web hosted
Follow the first three steps as defined before.
Step 4
Connect one more ultrasonic sensor to the input 2 of the Havi controller.
Step 5
Use the code file ‘360 SONAR_Web.py’ & save it to the ‘Radar’ folder.
Follow the steps 5 & 6 from the previous version. Instead of using the file ‘180 SONAR_Web.py’, use the file ‘360 SONAR_Web.py’. The map will be generated as below in the browser.

Look how Havi heroes have created one more variation of ultrasonic radar project. You can use your prediction to shoot the object identified in radar system. Watch the following video: