How to make a lightsaber – The star wars toy

Once upon a time in the galaxy, Far, Far away….!
Yes yes, you guessed it right, Start Wars!
Have you ever admired those iconic lightsabers from Star Wars? You know, those long, glowing sticks? Well, we’re about to show you how to make your very own diy lightsaber using Havi Elements. An entire generation have called them “fighting with tube lights” though.
What is a lightsaber?
A light saber is a powerful and iconic weapon featured in the popular Star Wars movie series. It’s a sword-like weapon having a blade made of energy and emitting light.
What is a lightsaber made of
The original lightsaber utilizes special crystals, known as Kyber crystals, to channel and focus power cell energy.
You can even create your own- DIY lightsaber using paper and LEDs. You can make a lightsaber toy using Havi Elements – DIY Robotics Starter Kit, Havi Elements – DIY Robotic Car Kit or Havi Elements – DIY Smart Lighting Kit.
Let’s start.
How to make a lightsaber using Havi Elements?
Things you need
Elements:
Power – 1
LED – 3
Accessories
LED cables: 12
Powerbank with USB cable: 1
Craft material
OHP Sheet
Butter paper
Aluminium foil
Black tape
Cello tape
Rubber bands
Pen
Contact us to get the material for making DIY Lightsaber.
DIY Lightsaber: The making
Step 1
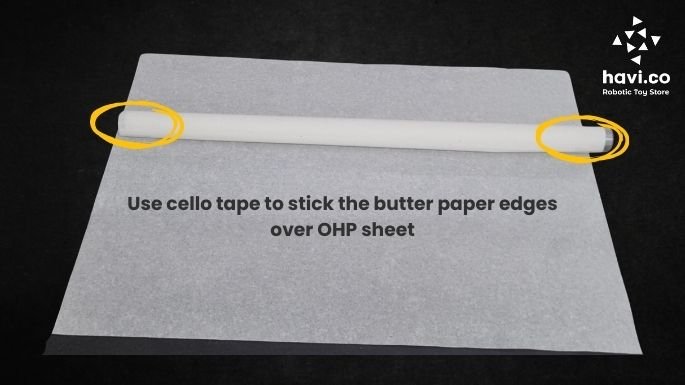
Roll the OHP sheet to form a tube. To lock, stick the edges of the tube using cello tape. (Use pen to roll the tube)

Cover the rolled OHP sheet with butter paper.
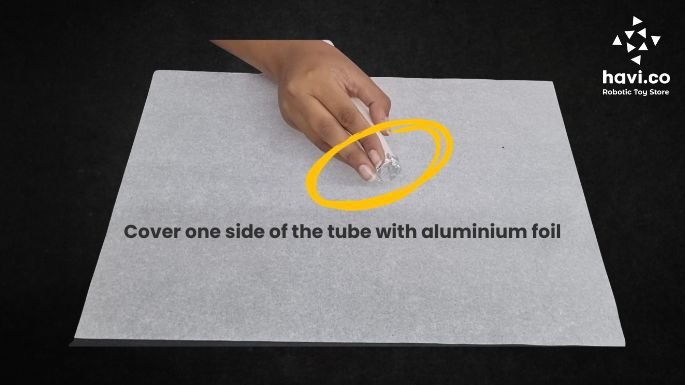
Cover one side of the tube with aluminium foil.
Snap the elements to make this circuit: Power + LED + LED + LED. Connect the LED cables with the LED Element.
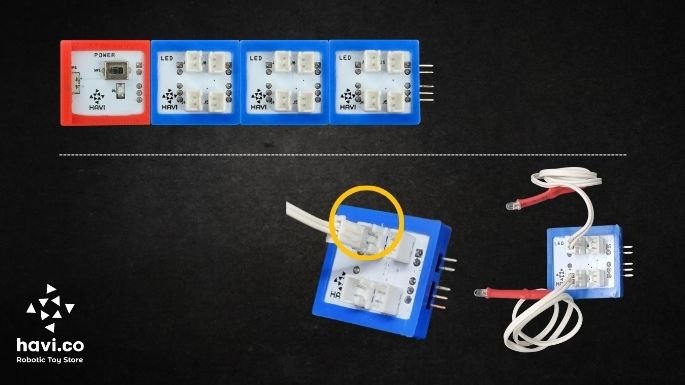
Using 3 LED elements will deliver the finest. If you are using elements at school, you should have enough of this. But if you are using it at home, just settle with a single element.
To purchase additional LED Elements & LED Cable, click here
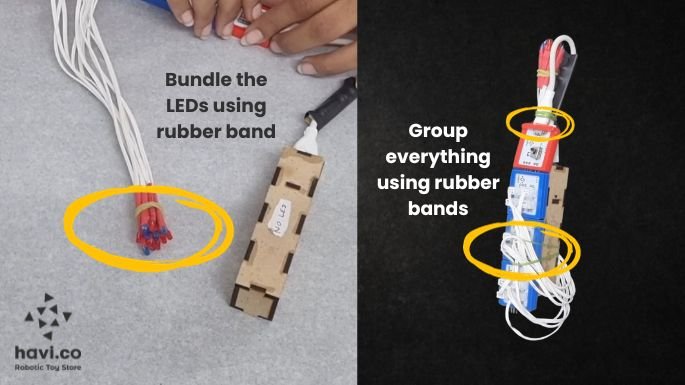
Step 6
Bundle the LED cables together using a rubber band.
Step 7
Group the circuit, LEDs, and power bank using rubber bands to form a handle.
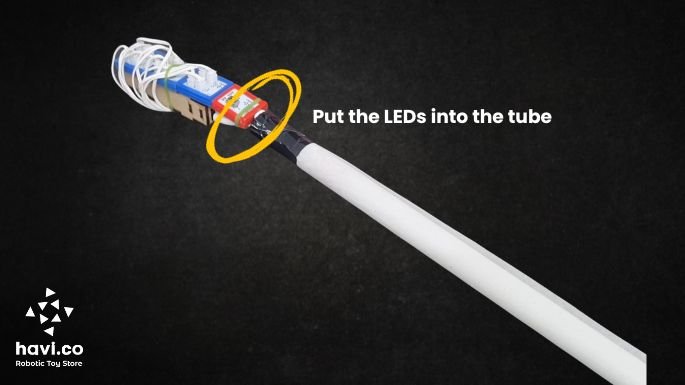
Put the LEDs into the tube and turn the power on. Your DIY lightsaber is ready..!

How does an LED lightsaber work?
When you switch on the Power Element, powerbank passes the stored current to the Power Element. The Power Element then transfers the current to the connected LED Element. The LED Element receives the required current to illuminate all the connected LEDs at the same intensity.
In this setup, the LEDs pass through a roll and cast light on aluminum foil. Since aluminum is a good reflector, it reflects the light rays back. This creates the effect of a lightsaber.
In this manner, you can construct a DIY lightsaber model using LED lights and paper craft.
Now, go ahead and create your own LED lightsaber for endless fun.