From glowing balloons to paper moon: DIY projects that teach kids the science of light
When a Classroom Started Glowing: Teaching Light Through DIY Projects
The room lights were switched off.
A faint beam from a single LED flickered on the table.
Vidisha – a homeschooling mom – looked at her three kids—Zoya, Jainam, and Sushrut—and asked,
“Why does this light feel harsh, but a lamp at home feels soft and pleasant?”
They leaned closer, curious.
“Because it’s brighter?”
“Because of the color?”
“Because it has a cover?”
Vidisha smiled.
“Today, you’re not going to learn the answer. You’re going to build it.”
Instead of dividing into groups, she handed each of them a small kit—an LED, a coin cell, and a few materials.
“Each of you will try a different way to make this light look beautiful,” she said.
The Challenge: Make Light Beautiful
Vidisha handed over the following components and materials to each child.
- Power element
- LED element
- LED cables
- Power bank with USB cables
- A mix of materials—paper, cardboard, balloons.
All these electronic components are part of the Havi Elements DIY Smart Lighting Kit and Havi Elements DIY Robotics Starter Kit, which the father has bought home recently for the children.
The instruction was simple:
“Use the same LED. But make the light look different.”
Not brighter. Not dimmer. Just… different.
Project 1: The paper moon
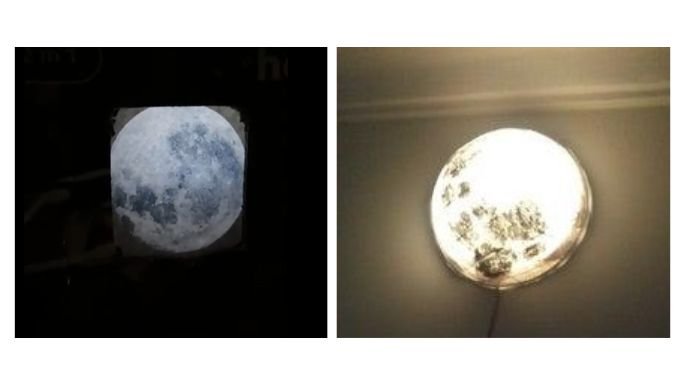
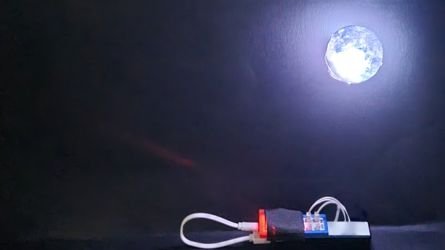
Sushrut printed a picture of the moon on regular paper. He took a box and colored it completely black.
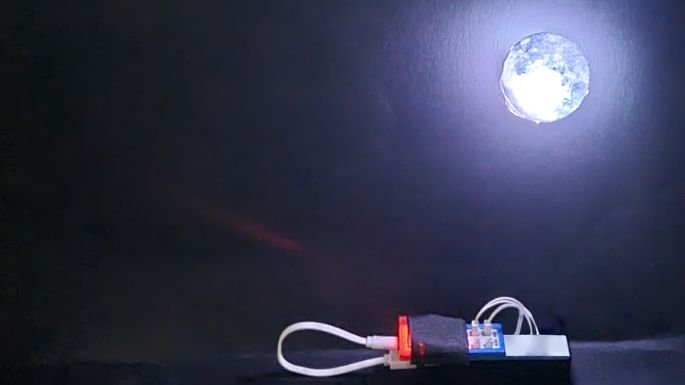
He carved out a piece of cardboard exactly the size of his paper moon and placed the paper moon at that palace. Behind, at a distance of around 2–4 cms, he placed a couple of white LEDs and turned the power element on.
His setup was very smart!
With the black background, moon texture and glowing LEDs create a perfect scene of the moon glowing in the sky.
Why has sushrut kept LEDs at a distance from the moon, and not to make it touch? Vidisha asked Zoya.
The youngest child was puzzled a bit for a while by this surprise question. But she knew her mom always encourages experimentation. So without hesitation, Zoya brought the Elements circuit nearer so that LEDs would touch the moon.
Because if it touches, the light becomes a sharp spot and not a moon-like glow. So we need to adjust the distance to get a softer glow – Zoya replied.
Vidisha was happy – not just happy, proud of her children.
Increasing the distance between the LED and the paper reduces harsh spots and improves diffusion.
Project 2: The Glowing Balloon
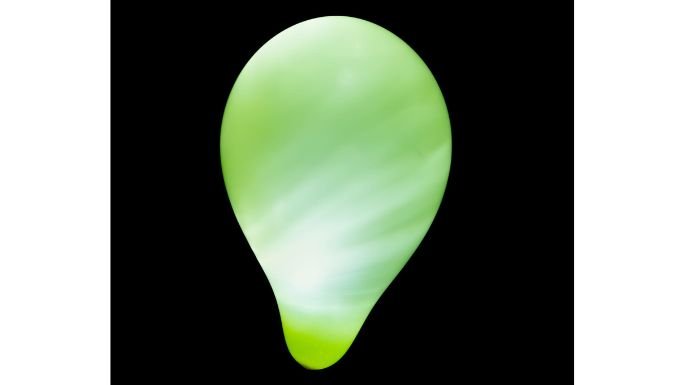
Zoya turned her party mode on – picked up balloons and started blowing them. She blew a few and stuck them on the wall as if she was decorating for a birthday party.
Then she taped the Havi Elements circuit near the balloons. And lastly placed one LED cable behind each of the balloons, just at the point where the balloon touches the wall.
As she turned on the power element, the LED turned on, and the balloon didn’t just light up at one point—it started glowing beautifully from within.
She started experimenting with combinations of balloon colors and colors of LEDs.
- Blue balloon → cool, soft glow
- Red balloon → warm, festive look
- Yellow balloon → bright and cheerful
The wall behind disappeared into darkness, and the balloons looked like floating glowing orbs—perfect for decoration.
“This looks like a party already!” Jainam said.
Tip:
- A small gap helps spread the light better.
- White balloons give uniform glow, colored ones create mood lighting.
Project 3: The DIY Lightsaber
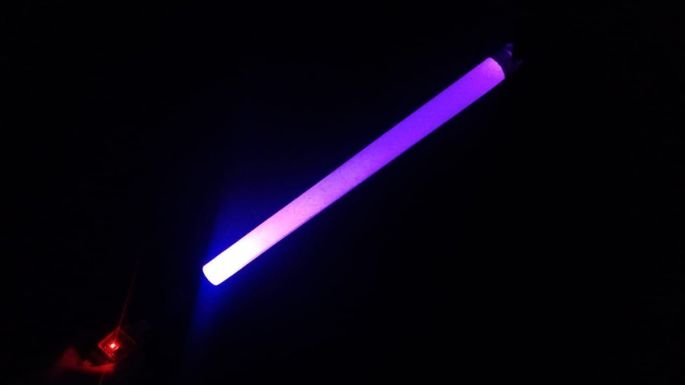
Jainam loved the idea of making something “cool”.
Jainam checked how to make a lightsaber.
Following the instructions, he rolled a translucent plastic sheet into a tube and placed a few LEDs at one end.
Jainam wrapped the plastic roll with diffusion paper and Jainam was ready with his “weapon”.
As soon as the LED turned on, something magical happened—the light didn’t stay at the base. It spread along the entire tube.
The turning point
Vidisha gathered all three of them.
Same LED. Same power source.
Three completely different results.
She asked:
> “Why?”
This time, the answers were different.
- “Paper spreads light”
- “Balloon spreads it even more”
- “The tube makes it travel”
The science behind it: Diffusion
Vidisha explained:
- Light usually travels in straight lines
- But when it hits certain materials, it scatters in many directions
This scattering of light is called diffusion.
Connecting all three projects
Paper Moon → soft glow due to mild diffusion
Balloon Setup → strong scattering creates full glow
Lightsaber Tube → light spreads along a path (guided diffusion)
What the kids really learns
Not definitions. Not memorization.
But real understanding:
- How to control light
- How materials affect outcomes
- How distance changes brightness and softness
- How to experiment and improve
And most importantly:
– Science is not something you read.
– It’s something you build, see, and feel.
As the room lights turned back on, the glowing moon still shone softly, and the balloons added a festive charm to the wall.
Vidisha smiled and said:
“Next time you see a lamp, a glowing decoration, or even the moon—
remember, it’s not just light… it’s how light behaves.”
Here is a lesson plan for teachers and parents to teach light diffusion in classrooms and at home.