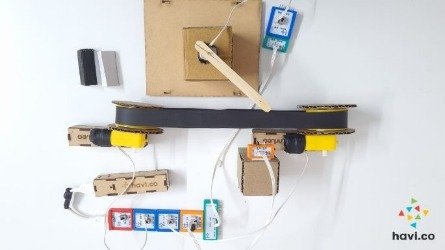
DIY Conveyor Belt with sensor using Havi Elements
Have you ever thought how factories would have been producing products like cars, phones, and havi.co’s toys?
They use a more than 100-year-old but still useful (after several iterations) mechanism called a conveyor belt.
What’s a conveyor belt?
Actually, it’s a transport system for objects. When objects are supposed to be transferred from one place to another within a limited distance, a belt is used for that. The belt can be made out of rubber, plastic, or metal.
The escalator that we see and use at malls and airports are also conveyor belts. And yes yes, the luggage belts too, at airports.
How to make a DIY conveyor belt model?
The conveyor belt can be made in 2 different versions.
1. A regular conveyor belt
2. A conveyor belt with a sensor. In this, the sensor will let only black objects pass and white will be taken out.
In this post, we will make both of them. First will make a regular conveyor belt (Step 1 to 7). And then will extend that to a sensor-based smart conveyor belt. (Step 8 onwards)
Material for a regular conveyor belt
Elements:
Power – 1
Motor – 2
Accessories:
Power bank with usb cable – 1
Wheel – 2
Geared motors – 2
Craft material:
Double sided tape
Two boxes of around 2 cm height for motor support
Cardboard
Cutter/ scissors
2 cm wide and around 60 cm long stripe of strong but smooth material like nylon, tyre tube etc.
Contact us to get these elements & accessories.
Step 1
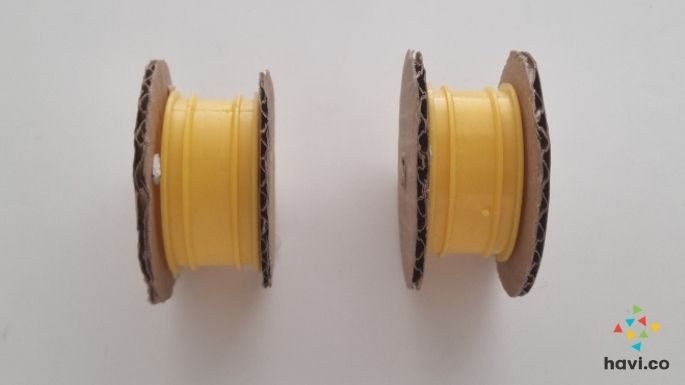
Remove the wheel grip. We need only the yellow ring for the project but keep the grip safe. Need to cover the wheel back with grip after the project.

Make 4 discs out of cardboard. The diameter of the cardboard disc should be around 1.5 cm more than the wheel rings, hence at least 7 CM.
In two of the discs, Make a hole of adequate size, so that the wheel shafts pass through it without friction and brushing.
We need to stick the discs on both sides of the ring using DST. Check the photos for reference.


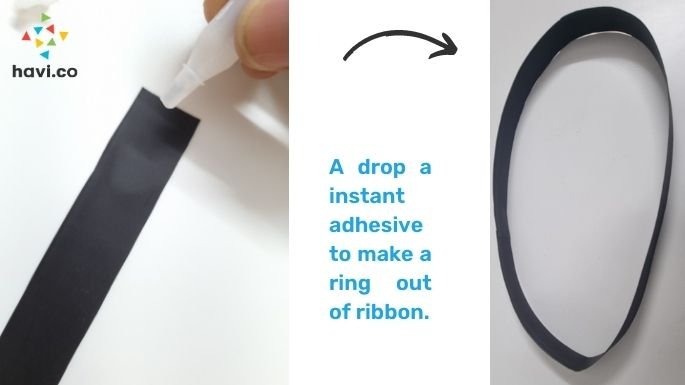
Cut a piece of a band out of the tube. We have cut the sleeve tube for this purpose. You can use nylon too. The piece needs to be 2 cm in width. It should fit well between the grooves of wheel rings.
Use instant adhesive to join the ends of the ribbon and create a ring out of it. This is your belt.

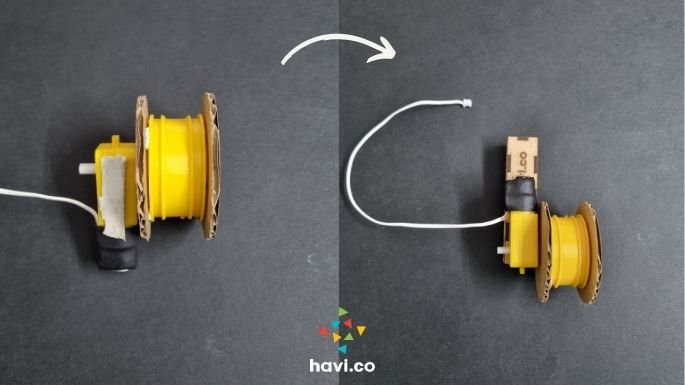
Snap the ring setup and the geared motor.
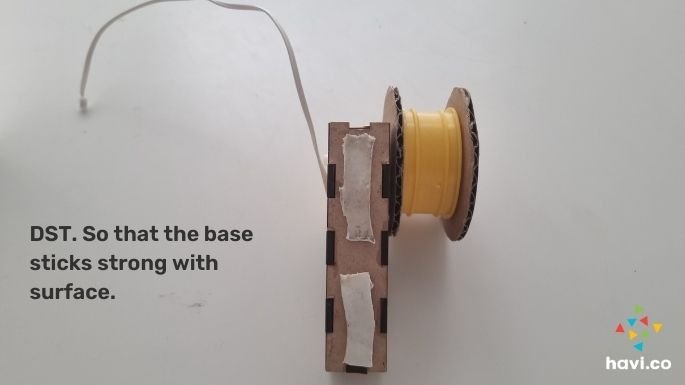
Use a box or something else which is stronger and is around 2 cm in height. We have used power banks. If you are creating with havi’s kits at schools or have friends around having their Havi’s robotic toys, you too can use power banks as base.
Stick the motors with your base. Make sure the discs are not brushing with the base, motor, or surface. They should rotate freely.
Put some pieces of DST on the bottom of your base so that it sticks well with the surface.
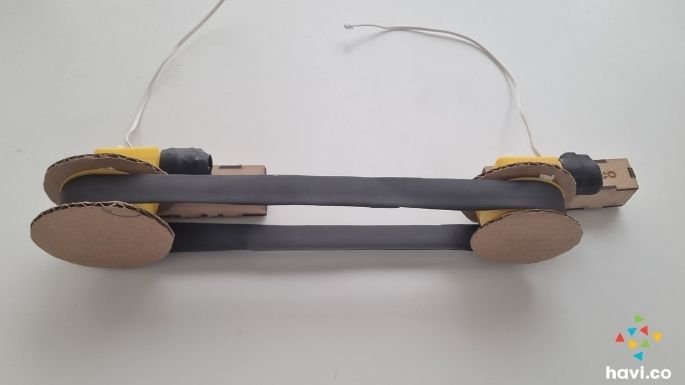
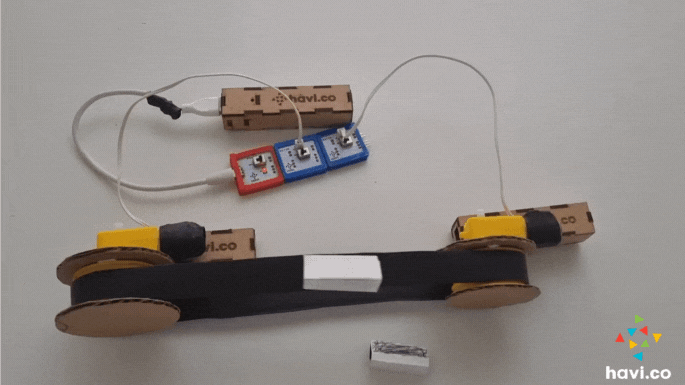
Pass the belt through both rings, so that it remains within the grooves of the rings. Discs are additional support so that the belt does not come out while in motion.

Keep both motors at an adequate distance so that the belt remains tighter. Stick the setup with the surface.
Snap the Power-Motor-Motor circuit and connect with a powerbank. Connect geared motors with motor elements.
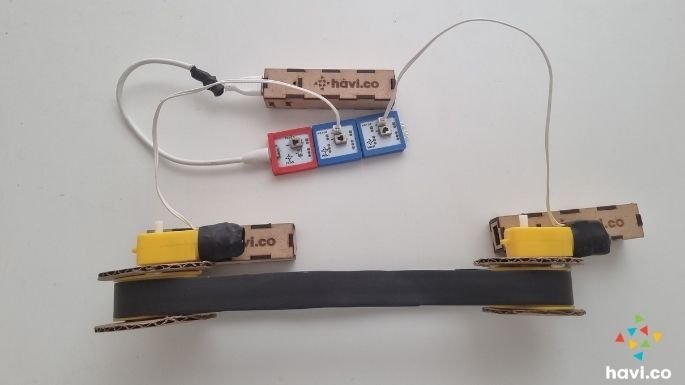
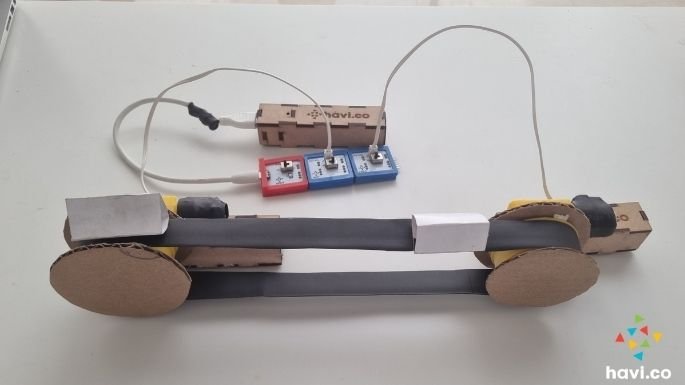
Both motors should be rotating in the same direction.
The belt should be adequately stretched. If it is loose, the belt will not move onward and may come out of the wheels. If it is way too tight, DST won’t be able to hold the bond.
The discs should be of adequate size to prevent the belt from coming out while moving.
Sensor based DIY conveyor belt project
And from here, we convert this into a smart, sensor based conveyor belt. This conveyor belt will distinguish between white and black objects and will let only black objects pass on the belt.
Additional material required for a smart, sensor based DIY conveyor belt project
Havi Elements:
IR Element
Motor Element
Extend Element
Accessories:
Gearless motor
Craft material:
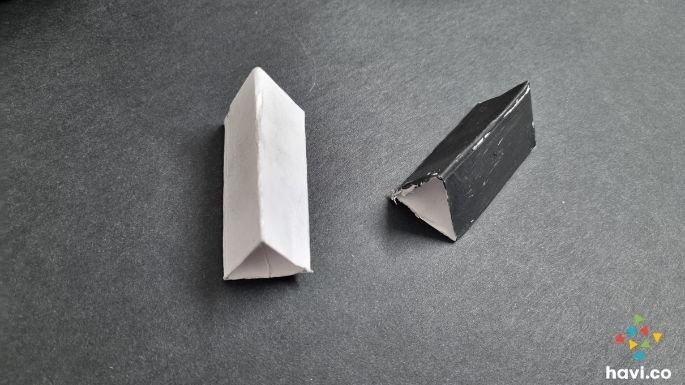
Smaller boxes (2) or cardboard to make them.
Rubber bands (If we are making boxes ourselves)
Icecream stick
Step 8
We need a couple of boxes as motor holder and IR stand. Pierce the top of the motor holder box and make a hole so that the gearless motor passes through it and stays firm inside.
Pierce your ice cream stick and insert the shaft of the gearless motor into the hole.
Place the IR stand at the side of your circuit and the motor holder at the opposite side.
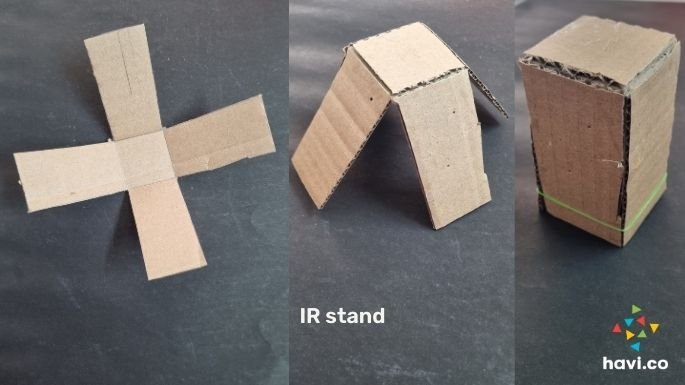
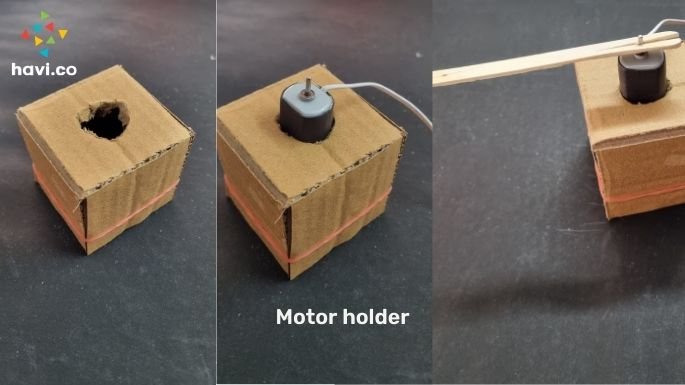
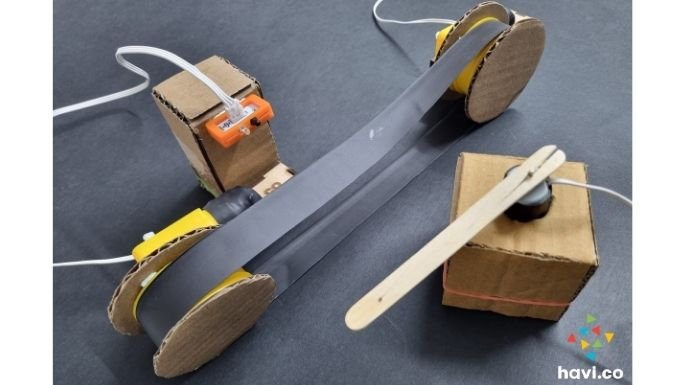
Adjust the heights of the IR stand and motor holder if required. Both of them should stay around half a centimeter above the belt.
Snap the IR, Extend and motor elements with your circuit. Checkout the photo. The cable of the extend element is passed under the belt. Sticked to the surface using smaller pieces of DST, to avoid belt brushing with that cable.
Tune the potentiometer and your smart, sensor based conveyor belt is ready.

Try placing black and white objects separately.
The gearless motor is under control of the IR element. So when the IR detects an object, the gearless motor will turn on and an icecream stick connected with it will wipe the object away.
As the object goes off, the gearless motor will stop.
When you are placing black object, the IR element won’t be able to detect it as an object so it will pass through the belt. WHY? Checkout how IR works.
When you are placing a white object the IR element will detect it as an object and as mentioned in point 2 above, the motor will take it away.
BTW you can do the opposite too. Take the black objects away and keep white (In Fact any other color) objects on the belt. How? Dot it and let us know.