Carnival ride project model using Havi Elements
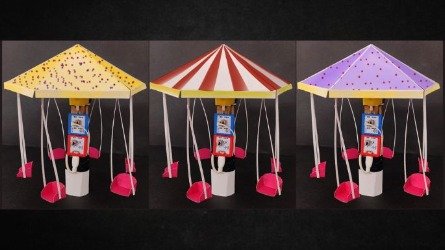
Remember the place where you enjoyed carnival ride the most? Amusement parks like Imagica, Wonderla, Science city or the local vacation fair? You might be fond of that swing carnival ride or would be afraid of sitting in one, but creating a carnival ride model at home is not scary at all. In-fact, it’s a joyful experience.
Yes, in this blog post, we are going to make a carnival ride model. This can be presented in your school projects and science projects as well.
We will understand the step by step process to make a carnival ride project using cardboard and Havi elements, will understand the carnival ride project explanation and at last will have some cool science experiments using our DIY carnival ride model.
What is a carnival ride?
Carnival ride is a mechanical device that has chair/seats in it, where people can sit & enjoy the thrilling rotation of the wheel. Mostly, seen in amusement parks, children parks and city fairs. These are known as Silly symphony swings, swing carnival ride and amusement ride aswell.
How to make a carnival ride?
We will make a carnival ride model using construction papers and Havi elements. You can make this using these robotics kits.
You can also make this project just by using Havi Powerbank-Geared Motor pack.
What will you need?
Elements:
Power – 1
Motor – 1
Accessories:
Geared motor -1
Powerbank with usb cable – 1
Craft material:
Card paper
Construction papers
Scissor
Scale
Pencil
Glue
Paper straw
Cello tape
Double sided tape
Thread or wire ties
Get the material to make carnival ride project model. Contact us.
The making
You can draw the shapes on construction papers yourself or can download the templates given at the end of the post. Print them directly on construction paper or print on regular paper and paste on thin cardboard.
1. Ceiling of carnival ride
Step 1
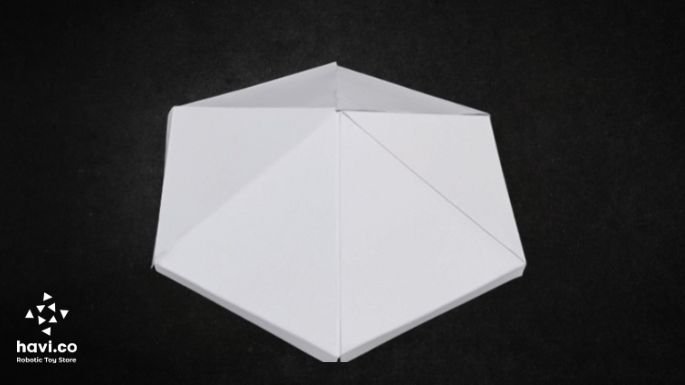
Cut the card paper to make a triangle with flaps of defined measurement. Make 6 triangles with these extra flaps.

Step 2
Fold the flaps of the triangles from the pencil marks. You can see that now the triangle is formed properly.

Step 3
Stick the folded edges with each other using glue. Stick all the 6 triangles with each other to make the ceiling for carnival ride.

Step 4
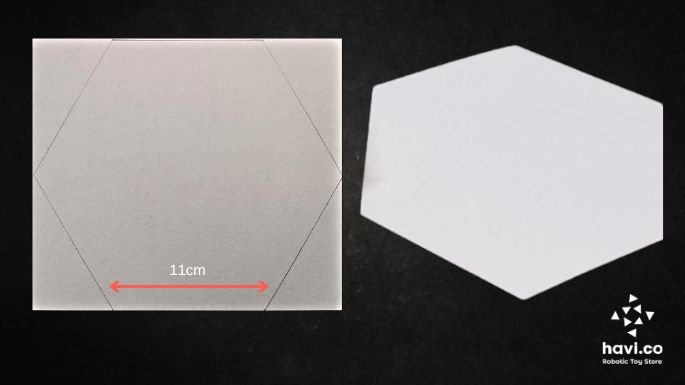
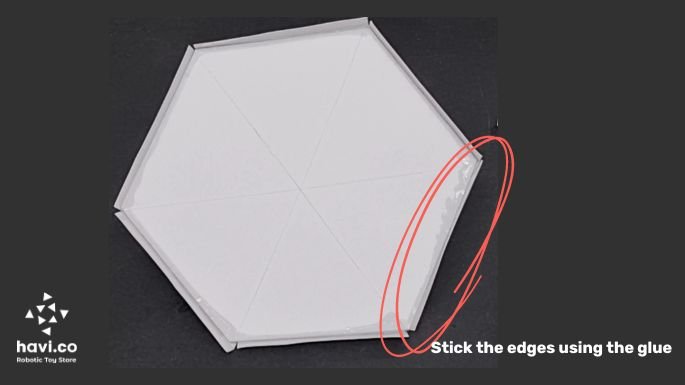
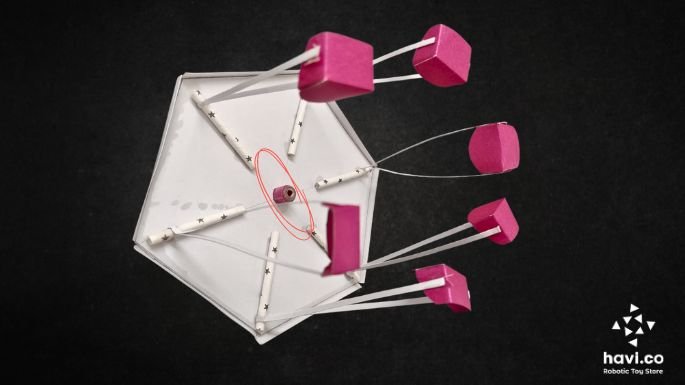
From another card paper. Draw a hexagon and cut it using a scissor. Draw connecting lines using pencil from hexagon edges.
Stick the hexagon along with the ceiling.

2. Swings of carnival ride
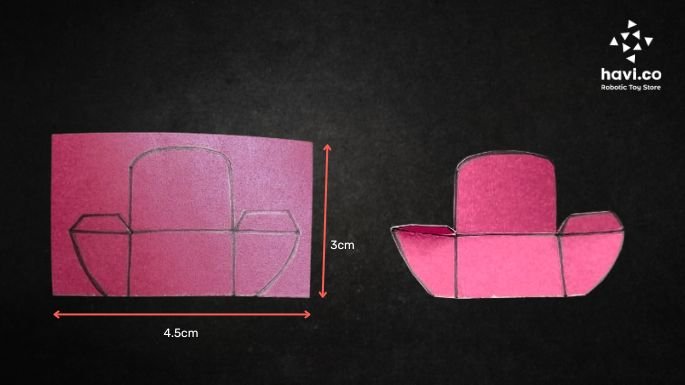
Step 5
Draw or take print of following object. Cut on the outlines and and fold the shape. Glue to bind the joins. You have made one seat. Need to make 6.
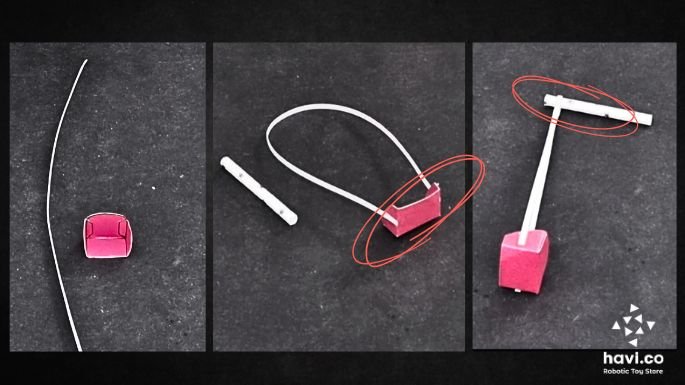
Step 6
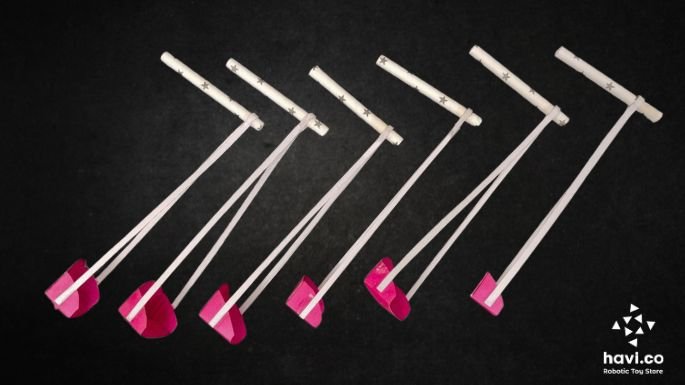
Use a string or thin paper strip to hang the seat along the ceiling. Stick the thread with paper straw. Repeat the process to make 6 swings.
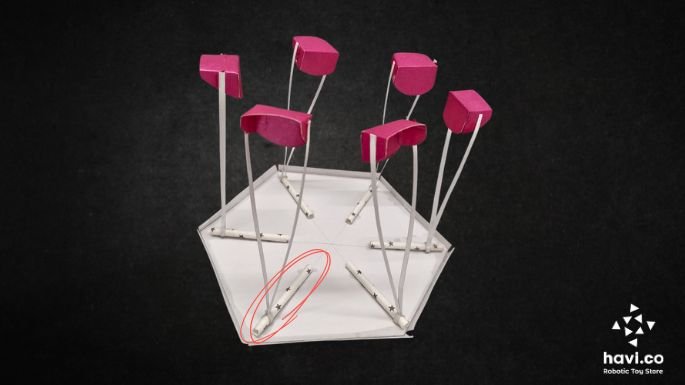
3. Assembly of swings & ceiling
Step 7
Stick the paper straw on the hexagon side of the ceiling surface.
Step 8
Make an insertion for the motor shaft and stick it along with the ceiling.

4. Circuit of carnival model
Step 9
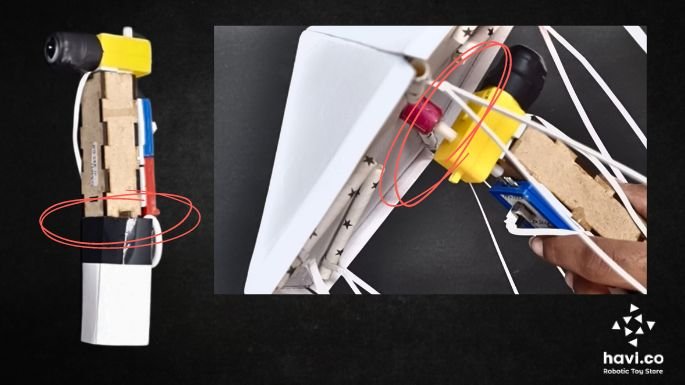
Snap the Elements to make the circuit: Power + Motor. Connect the circuit with the powerbank.

Step 10
Stick the circuit over the power bank using double-sided tape. Connect the geared motor with Motor Element.

Step 11
Stick the geared motor on opposite side of usb cable connection of powerbank.

Step 12
Push the cable side part of powerbank into that roll. The handle to balance the carnival ride is ready.
Step 13
Insert the geared motor shaft to the paper roll fixed on ceiling of ride.
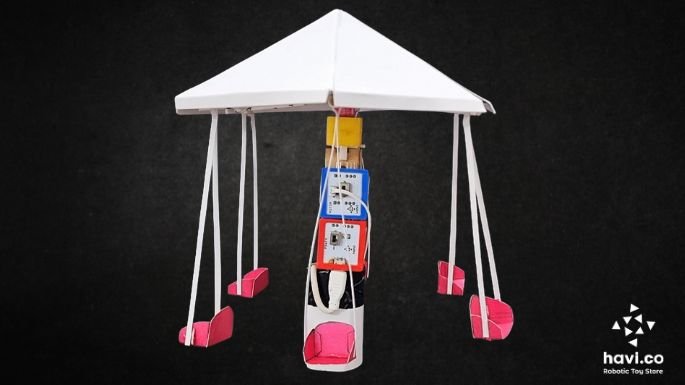
The carnival ride model is ready.
Step 14
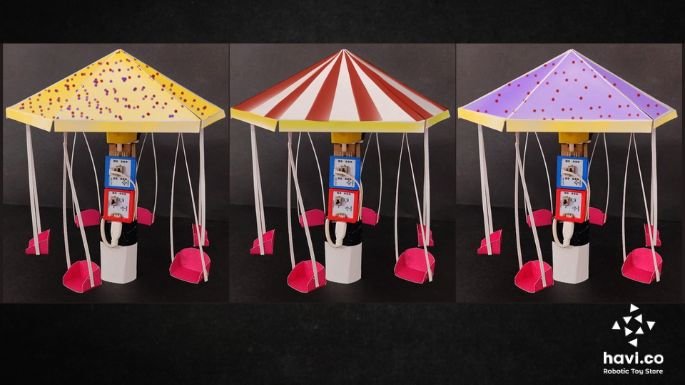
Decorate it as per your choice.
How does carnival ride model work?
Here is the carnival ride project explanation that can be useful to help you understand the science and present the project during the science fair.
When you switch on the Power Element, the power bank passes the stored current to the Power Element. Subsequently, the Power Element transfers the current to the connected Motor Element, providing the necessary power for the rotation of the attached geared motor. Once the DC geared motor initiates, the connected card ceiling begins to rotate, causing the carnival ride to spin.
The science in carnival ride model
Here is a challenge for you.
Hold your carnival ride from the base or the Powerbank. You can’t touch anywhere else.
Now Can you increase the speed of the ride? No you can’t touch anywhere else. Try it!
And if you succeed, here’s another challenge: Try slowing down or stopping the ride, without touching anything, with your hand or any other object.
Pause for a moment and try to solve both of these yourself. Then read on.
Hold your carnival ride project firmly by the base or the Powerbank. Now spin the Powerbank in the direction of ride’s rotation. What happened?
Yes, the ride speeds up.
Now do the opposite — move your hand in the direction opposite to the ride’s rotation. Now?
What you saw is correct, it slows down or even stops for a moment.
This is science and it’s called relative motion.
Where else do you experience relative motion?
1) A flight flying with or against the wind
2) You climbing up or down a descending escalator
Try finding 3 more such cases yourself.
Now imagine you are sitting on one of the chairs of the ride. What will happen in the following cases?
1) The pole is spinning in the same direction as the ride.
2) The pole is spinning in the opposite direction of the ride – but slower than the ride.
3) The pole is spinning in the opposite direction of the ride – but faster than the ride.
4) The pole is spinning in the opposite direction of the ride at exactly the same speed as the ride.
Each of these will have a different effect — and we want you to find the answers yourself.
Make your own carnival ride using Havi Elements and be ready to present in the next school project. Contact us to get all the components to make this project.